Container Gardens
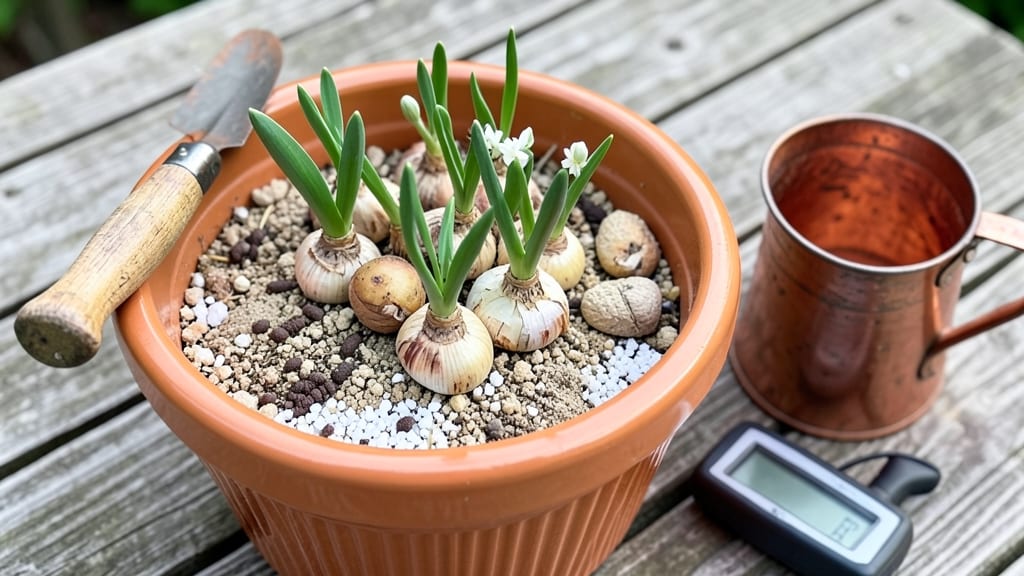
Layering bulbs in containers turns even the tiniest balcony into a four-season showstopper—no yard required. 🌱 I’ve filled patio pots with blooms from February through October by stacking early, mid, and late-season varieties, creating a cascading display that never skips a beat.
The trick isn’t complicated: it’s about layering bulbs by height and bloom time, then letting nature handle the rest.
You’ll need one container (at least 12 inches deep), well-draining soil, and a mix of bulbs like tulips, daffodils, crocuses, and alliums—each with its own bloom window. The key is planting the tallest bulbs first, then layering smaller ones around them, with the earliest bloomers at the bottom.
Most people overthink the soil, but a simple blend of potting mix and perlite works perfectly.
Once planted, your container becomes a self-watering system—just keep the soil slightly moist (not soggy) and place it in bright, indirect light. By spring, you’ll see crocuses peeking through, followed by tulips and daffodils, then summer bloomers like lilies taking over as the season progresses.
The best part? You’ll save space and money by reusing the same container year after year.
This method works for any climate, though cold-hardy bulbs (like snowdrops or grape hyacinths) handle winter best in zones 3-7. If you’re in a warmer zone, opt for heat-tolerant varieties like rain lilies or spider lilies.
The only real mistake? Crowding bulbs too closely—stick to the one-bulb-per-inch-of-pot-width rule, and you’ll avoid competition for nutrients.
📚 In This Guide
- What you need
- Instructions
- Tips and common mistakes
- Wrapping up and next steps
What you need
- ● Containers: At least 1-3 pots per bulb layer (depth: 6–12 inches, drainage holes mandatory). Choose sizes based on bulb types (e.g., small pots for crocus, large tubs for daffodils).
- ● Bulbs: Select 3–5 varieties with staggered bloom times (e.g., tulips, hyacinths, alliums, crocus). Buy 1–3 bulbs per pot, depending on size.
- ● Potting mix: Well-draining, bulb-specific mix (or blend 50% potting soil + 50% perlite/sand). 1–2 gallons per pot.
- ● Drainage layer: Pebbles, gravel, or broken pottery (1–2 inches) to prevent rot.
- ● Slow-release fertilizer: 5–10-10 or bulb-specific granules (1 tbsp per pot).
- ● Garden trowel (for planting and layering).
- ● Measuring tape/ruler (to track bulb depth).
- ● Watering can (with a gentle spray nozzle).
- ○ Optional: Mulch (gravel or bark) to protect overwintering bulbs.
- ● Decorative stones or moss for a polished look.
- ● Label tags to track bulb varieties.
Step-by-Step guide to layering bulbs in containers
This method delivers seasonal color in small spaces—here's how to stack blooms like a pro.
🪴 Step 1: Select and Prepare Your Container
Choose a container with drainage holes at least 12 inches deep to accommodate multiple bulb layers. I prefer terra cotta because it breathes and prevents root rot, but any sturdy pot will work. The 4 containers we're using will each produce year-round blooms—spring crocuses, summer dahlias, fall anemones, and winter snowdrops.
Fill the bottom 2 inches with gravel or broken pottery for drainage. This critical layer prevents waterlogging that would rot your bulbs. Tap the container gently to settle the drainage material evenly—no gaps should remain, or water will pool at the bottom.
🌱 Step 2: Layer Bulbs by Bloom Time (Bottom to Top)
Start with the largest, deepest-rooted bulbs at the bottom—these are your late-season bloomers like dahlias or gladiolas. Place them 6-8 inches deep, spacing them 3-4 inches apart horizontally. I arrange them in a loose circle to create visual balance while allowing room for smaller bulbs above.
Add 2-3 inches of potting mix between layers, then place the next tier of bulbs—this time your mid-season bloomers like tulips or alliums. These go 4-6 inches deep. The key is spacing: each bulb needs room to push through the layers above without crowding. Top with another 2-3 inches of mix before adding your smallest, earliest bloomers like crocuses or grape hyacinths.
💧 Step 3: Finish the Container and Water Strategically
Fill the remaining space with moistened potting mix, leaving just 1 inch below the rim for watering. Press lightly but don't compact—bulbs need loose soil to establish roots. I always add a slow-release bulb fertilizer mixed into the top layer to feed the earliest bloomers as they emerge.
Water deeply but gently until moisture runs from the drainage holes. This first watering settles the mix and removes air pockets around the bulbs. After that, keep the soil evenly moist (not soggy) until spring growth appears. Once shoots emerge, reduce watering slightly—overwatering at this stage causes rot before blooms even appear.
☀️ Step 4: Position for Light and Seasonal Care
Place containers in full sun (6+ hours daily) for maximum bloom production. A south-facing spot works best, but east or west exposures still deliver strong results. Rotate containers quarter-turn weekly so plants grow upright rather than leaning toward the light.
After the first flush of blooms fades, trim spent stems but leave the foliage until it yellows naturally. This process feeds the bulbs for next season's blooms. In fall, add a 2-inch layer of mulch to insulate overwintering bulbs—this protects them from temperature swings that can cause dormancy issues.
⏰ Step 5: Renew and Rotate Bulbs Annually
Every 3-4 years, refresh your container by removing and dividing crowded bulbs. Lift them carefully after foliage dies back, separate offsets, and replant the healthiest specimens in fresh mix. I always replant the largest bulbs at the bottom layer to ensure they remain the structural foundation of the container.
This rotation keeps your display vibrant and prevents bulb decline from overcrowding. The 4 containers we started with will continue producing blooms for decades—just keep rotating the bulbs and maintaining the layers. Watch as each season unfolds with new colors emerging from the same pot!
Tips & tricks for perfect year-round container blooms
Creating a layered bulb display that thrives through all seasons takes thoughtful planning—here's how to avoid common pitfalls and maximize your blooms.
Drainage is Non-Negotiable: In Step 1, that 2-inch gravel layer is your first line of defense against rot. I've seen containers fail spectacularly when owners skipped this step—water pools at the bottom and drowns the bulbs. Use clean, sharp-edged gravel (not smooth river rocks) to create proper drainage channels. If your container has no holes, drill them yourself—bulbs won't forgive soggy conditions.
Layer Like a Pro: The spacing between layers in Step 2 is where magic happens. When placing your 3-4 inch spaced late-season bulbs at the bottom, imagine them growing upward through the layers above. I like to sketch a quick diagram first—mark where each bulb will emerge. This prevents the smaller top bulbs from getting crowded out by their larger neighbors below. The 2-3 inch soil layers between tiers aren't just filler; they create growth zones where each bulb can establish its own root system.
Watering Wisdom: That first deep watering in Step 3 settles everything perfectly—but timing matters. Water immediately after planting, then let the soil dry slightly before watering again. The goal is even moisture, not constant wetness. I set my containers on saucers to catch excess, then empty them after 10 minutes. Once shoots appear, reduce to every 5-7 days—overwatering now causes more rot than underwatering.
Light Matters More Than You Think: The 6+ hours of full sun in Step 4 isn't just about blooms—it's about bulb health. I've had containers in partial shade produce flowers, but the bulbs weaken each year. For maximum vigor, position containers where they'll get morning sun plus afternoon light. If your space only offers partial shade, choose shade-tolerant bulbs like hyacinths or snowdrops for the top layers—they'll still bloom beautifully even with less light.
Pro Tips for Layering Bulbs In Containers
- Creating a layered bulb display that thrives through all seasons takes thoughtful planning—here's how to avoid common pitfalls and maximize your blooms.
- Drainage is Non-Negotiable: In Step 1, that 2-inch gravel layer is your first line of defense against rot.
- Layer Like a Pro: The spacing between layers in Step 2 is where magic happens.
Frequently asked questions
Got questions about layering bulbs in containers?
You’re not alone! Here are answers to the most common concerns—so you can create stunning, space-saving blooms with confidence.
How deep should I plant each layer of bulbs?
Plant the largest bulbs (like tulips or daffodils) at the bottom (6–8 inches deep), then layer smaller bulbs (crocuses, hyacinths) 2–4 inches above. The top layer (like snowdrops) only needs 1–2 inches of soil. Follow the "rule of thumb": depth = bulb height × 2–3.
When is the best time to plant layered bulbs?
Fall planting (6–8 weeks before your first frost) is ideal for most bulbs. Exceptions: Tropical bulbs (like amaryllis) wait until late winter/early spring. Check your USDA zone for exact timing—cooler climates may need earlier prep!
Can I reuse the same container year after year?
Containers last for years, but refresh the soil annually. Mix in compost to replenish nutrients. If bulbs decline after 2–3 years, replace them—some (like tulips) naturally fade faster than others (like alliums).
What if my container gets too hot or cold?
Bulbs need consistent temps. In hot climates, use shade cloth or place containers in partial shade. For cold snaps, move pots to a sheltered spot or wrap them in burlap. Drainage is key—ensure holes exist to prevent rot!
Are there bulb combos that bloom at different times?
Yes! Pair early bloomers (crocuses, snowdrops) with mid-season (tulips, daffodils) and late bloomers (alliums, lilies). Pro tip: Add foliage plants (like ferns or heuchera) to fill gaps between blooms for year-round interest.
Wrapping up and next steps
Layering bulbs in containers is your ticket to a burst of color and life, no matter how small your space! By stacking bulbs from tall to short and choosing the right varieties, you’re not just gardening—you’re creating a living masterpiece that blooms season after season.
The best part? It’s easier than you think, and the rewards—year-round beauty—are priceless.
Ready to dive in? Start small with a single container, experiment with a few bulbs, and let your creativity bloom! Once you’ve mastered the basics, expand your collection or share your success with fellow plant lovers. Happy gardening! 🌱✨